Thursday, November 29, 2012

last minute advent calendar

I always have big holiday plans, but then... life gets in the way, and I end up starting my advent calendar project with only a few days to spare... what makes me feel better is knowing that I'm not alone ;)

last minute advent calendar

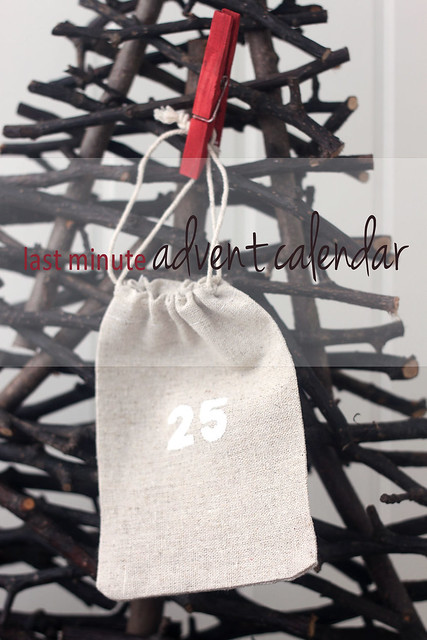
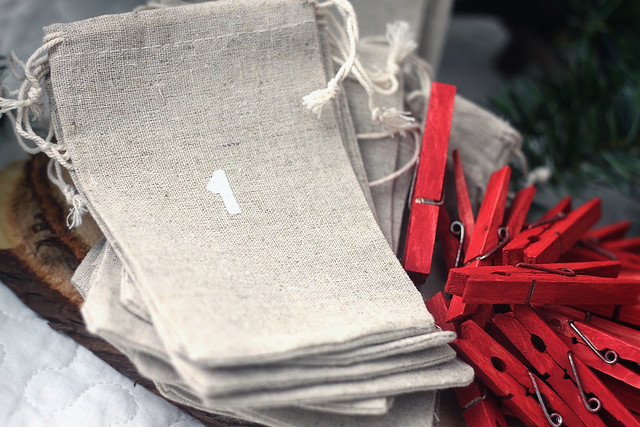
It took me all of 45 minutes to stencil the numbers onto 25 muslin bags, and maybe another 20 minutes to dry-brush red paint on a set of clothespins.  Not too shabby, I think, for something that my family will keep for years to come.  I plan on stringing them up onto a little clothesline in our kitchen, and filling them with little chocolates and dollar-store-toys for the kids...and the husband...

last minute advent calendar
If you are not familiar with the technique of using freezer paper to stencil onto fabric, it's very simple:

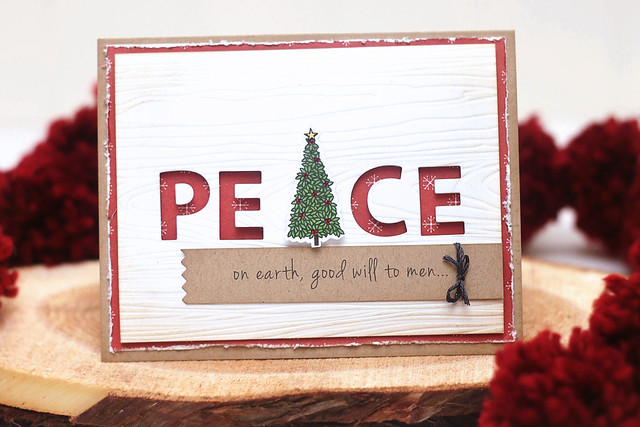
- die cut, fussy cut, or silhouette cut (yes, there is a way to cut freezer paper in the silhouette - but that's for another time!) your desired shape or image, glossy side down.  (I used Papertrey Ink's block alphabet number dies.)

- set the glossy side of the freezer paper to your fabric and, with a hot iron, adhere it to the fabric.

- with some fabric paint and a sponge brush, layer in your color.

- when the paint is dry, peel off the freezer paper and voilà! a perfectly painted image.  

- the next day, I recommend ironing your project again, just to seal everything in.

last minute advent calendar
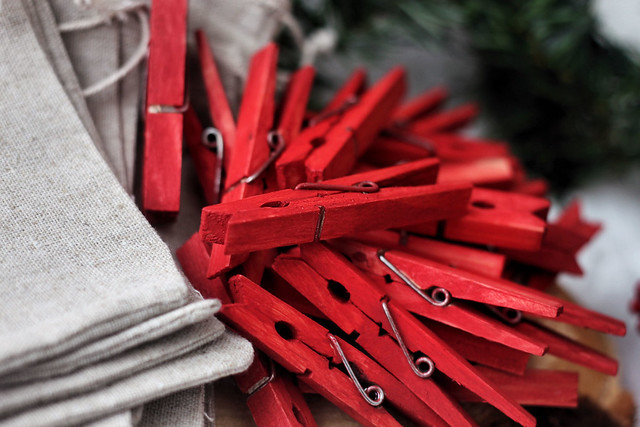
I used regular acrylic paint for the clothespins, and since my Christmas decor is headed into a more woodsy, and rustic direction this year, I decided that one dry-brushed coat was plenty.  They almost look more dyed than painted, and I love that.

last minute advent calendar

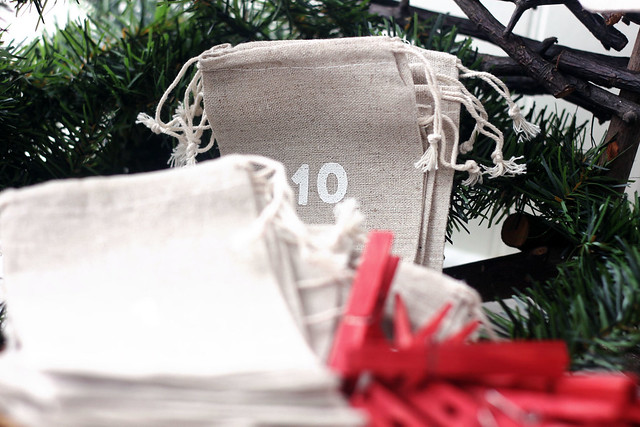
What does your advent calendar look like?  What do you fill it with?  Truth be told, we keep 2 of them in our home.  One for daily holiday activities and Bible readings, and the one the kids run to every morning... the candy one.... hee hee.

Wednesday, November 28, 2012

warm wishes

A christmas card with....

a bit of a retro feel,

and white whipped cream with a touch of sparkle,

in a huge, paper-pieced mug,

wrapped in a comfy quilt of hexagons,

and a cozy kraft panel, topped with the nicest faux-stitching image.

mod christmas

until next time,

e.

Tuesday, November 27, 2012

Christmas cookies - inspired by a handmade card

Hi peeps!

I have a special treat for you today.  I recently met up with Marlyn, the über-talented sugar cookie artist of Montreal Confections who basically lives in my backyard - how cool is that!

She created a set of cookies inspired by a card I made (you may remember it from *this post*), and all for a virtual cookie exchange on Haniela's blog.

I'm honored to be a part of this sweet celebration!  If you like what you see, I hope you'll click over to Marlyn's blog and leave her a little love....


Monday, November 26, 2012

gnome for the holidays.

Is it Monday already?  harrumph.  Not fair that the weekends fly by, when the weekdays (and especially Mondays) drag on so slowly...

If you needed a little monday-morning-smile, you're welcome:

season's greetingsaw, look - Santa's blushing ;)

I taught this card at my most recent class... it was so fun to show them how to mask the santa hat (from lawn fawn's "hats off to you") and stamp the gnome (from "gnome sweet gnome") underneath the hat.  We also masked the trees in the background, to create depth within that layer.

All of the patterned paper I used are from lawn fawn's christmas collection.

Thanks for popping by!

Sunday, November 25, 2012

what's shakin, bacon?

I have a fun little rag doll card on the app today.  If you're like me, it's easy to create cards for babies and kids, but for a 10 year old boy?  A little trickier.  This one got a smile and a nod.... can't ask for more than that ;)


Click on the image to be taken to the app store.

Have a great day!

Friday, November 23, 2012

peace and good will.

Sooo, how many of you are black-friday-shopping today?  putting up christmas trees today? hee hee.  I think we'll wait about a week for the tree, but I did start sampling some christmas music at home this week :)

peace and goodwill.

Here's a card we made at my last card-making class, on Tuesday night.  I must have been extra tired, because when I handed them a little baggie with the little inserts for the letter "P," I called them p-holes, which made the ladies tease me mercilessly for the rest of the night.... hee hee....it happens :)

I used CSS letter dies, the tree from PTI's "home for the holidays" and a computer-generated sentiment to create this card.

Have a great weekend, all!

Tuesday, November 20, 2012

mmm.... thank you


With American Thanksgiving just days away, the CSS team is showing off our best "thank you" cards.

I thought I would make a little something to send to the gals who participated in the cookie exchange party that my sister and I hosted together.

If you missed seeing the full party, click *here.*

And it all started with an invitation - click *here* to see the beginnings of our cookie exchange paperie.

If you host a party, and prep all of your own decorations, here's my best tip for you: use parts of the decoration to create quick and easy (and matching!) thank you cards.

I deconstructed the candy cane striped background from one of the leftover voting cards, found an extra tree-shaped cookie image that I had never used, and gently peeled the "mmm..." banner from one of the cookie labels.  Even the holiday twine was re-purposed!  I removed it from a voting card, and used it to thread a festive red button.

The only stamping I did was to stamp the text background on the main panel, and add the "thank you for coming" sentiment, from "favor flags."


Just for fun, I added a snowflake pattern to the envelope - which is A4 sized, to match the thank you card.

So, happy thanksgiving!  And also, see?  creating thank you cards can be so quick and easy!  I hope I've inspired you to create and send out handmade thank you cards after your next party.

Grab a mug of hot something and enjoy your visit to these blogs:

Monday, November 19, 2012

send it by gingerbread mail... {lawnscaping challenge}

Happy Monday!

It's time for another lawnscaping challenge - time to work on your stash of tags!  (Or, slap a tag on a card, in my case... you know I like to be all "iron chef" in this crafty kitchen...)

I'm sending some sweetness via gingerbread mail.  I used "you've got mail" and mixed it in with some "sweet christmas" to create this card.  (Note:  I used the postage stamp image from PTI's "postmarks" set instead of the one in the lawn fawn set because it was a bit bigger - didn't want to squash little Gingie!")  

Also, who says the holidays have to be all red & green? (me.  I do.  I say it all the time.  But just pretend it's all silence for now...)  I'm rocking my favorite red-blue-white combo here... very airmail appropriate, no?

If you ever decide to CASE this card, do me a favor and make the gingerbread house detachable, will you?  That would have been awesome.  A card & christmas ornament, all in one.  The more creative ideas only come once the glue has been applied... ha.


Remember, no peeking until Christmas!  (That was more for my kids than for you... because, if they're anything like me, they might just sneak around the house, find wrapped presents, artfully and carefully unwrap them to see what's inside, and then re-wrap them so that no one is the wiser... it's possible I may have done that over the period of 5-6 Christmases... *wink*)

I can't wait to see your tag creations!  Link them up to the lawnscaping challenge blog and you could win a prize!  We're being sponsored by lawn fawn this week.


Saturday, November 17, 2012

chalkboard-inspired {Saturday Creations}

I have a chalkboard-inspired card up on the Precious Remembrance blog this morning...


Button snowmen are the cutest, no?

Click over to the Precious Remembrance blog for more card-chattiness :)

Have a beautiful day!

Friday, November 16, 2012

christmas cookie exchange party

Candy cane stripes, forest green banners, and softly-browned cookie colors were my inspiration for creating the decor for our Christmas cookie exchange party:


 If you are thinking about hosting your own cookie exchange party, here are the details to remember:

- invite more people than you think: not everyone likes to bake, or will be available to come.  I invite a dozen ladies, and ended up with 8.  (If you missed yesterday's post, click *here* to see the party invite.)

- each guest should bring 1 dozen cookies for each person in attendance, plus an extra dozen for sampling at the party.

- pull out some of your own Christmas decorations to set the festive mood, and have the platters set out before your guests arrive.

- since we hosted our party very early in the season, I encouraged my guests to bring cookies that would be suitable for freezing.

- do what we did, and turn the party into a fun contest!  I created voting cards and award ribbons... in the end, "best tasting" went to my sister, for her yummy peanut butter buckeyes...

- it was a very fun-filled evening with friends & sweet treats, and I have a fully stocked freezer ready for holiday gifting, as well as 7 new cookie recipes.


And, if you are crafting your own cookie swap decor, here is a link to the stamp sets you'll need from the Clear & Simple Stamps storecookie bake, designer lines, favor flags.

If you have a minute, I'd love to know if you'll be participating in your own holiday cookie exchange party!

Thanks for stopping by to take a peek at ours :)


Thursday, November 15, 2012

cookie exchange party invitation

I hosted a cookie swap over the weekend!  I'm showing off the invite today, as kind of a teaser, before I show off the whole party tomorrow...

When I put out the idea for a cookie exchange in November, I thought my friends would think I was crazy, but apparently we're all smart ladies, who would rather take it easy come December... you know, relax and enjoy the holidays and all that... *wink*

So, right now, I have 9 dozen cookies freezing comfortably, waiting to be defrosted for gifts or whatever (and by whatever, I may mean just for me...) It's like the heavens open up every time I peek into my freezer - all of those beautiful cookies!

As with any party decor, repetition is key to creating a pulled-together look.  So, this invite is the jumping off point for all of the decor you'll see tomorrow.  I used 3 CSS stamp sets to make Christmas come early: "cookie bake," "designer lines," and "favor flags."

I created a candy cane-striped base, and added a texty layer overtop (I adore that background strip from "cookie bake" - it just lists all kinds of different cookies!  What could be more perfect if you're hosting a cookie exchange?)  

My favorite part of this card (and I love it so) is a toss up between the green sentiment favor flag, and the white enamel accents on the christmas tree cookie image.  It looks like those edible pearls you'd see on a yummy gingerbread cookie.  It's the little things that make me happy :)

I tucked the when-what of the party onto a second tag shape... I love the personal touch of handwriting on a card, but I don't think everyone needs to see it front-and-center, either... hee.

If you are thinking of hosting your own cookie bake party this season, do it!  Here are the cookie swap basics:

-your guests come with their pre-baked cookies and the corresponding recipe (1 dozen x the number of party guests, plus an additional dozen for sampling at the party)
-you get to spend quality time with your best lovely ladies before the holiday rush, eating delicious treats
-you leave with enough cookies to gift out to teachers, neighbors, yourself (did I really just write that?  i have no shame...)

And, you can do what we did and turn it into a fun contest!  I won't give away too much, but I was voted best looking.  Er, my cookies were...

Hope to see you back here tomorrow!

Wednesday, November 14, 2012

snow-globe shaker tag & tutorial

Hi peeps!

I finally had time to break into my new "believe in magic" set by Mama Elephant.  

I thought I'd create a step-by-step photo tutorial to show how I made the tag.... enjoy!


Tuesday, November 13, 2012

wrap it up! {CSS new color release}

CSS is releasing brand new colors of cardstock, ink, and even gift wrap!  (click *here* for a pdf of all the pretty colors!)

Here's the official blurb:

"Clear and Simple Stamps has made the choice to "go green" and revitalize the CSS current color line.  You will see a few new colors and some vintage colors no longer being offered, in an effort to provide product made from renewable contents.  All of the color coordinated products are made in the USA.  The paper comes from mills that practice responsible, sustainable forestry while manufacturing the highest quality paper products on the market.  These mills are powered by renewable energy sources, and our paper products are made of 100% recycled content with 30% PCW (post-consumer waste.)  We are very pleased to announce our commitment to incorporate environmental practices into our daily crafting."

And what better way to show it all off than to have a designer blog hop?  Each designer has a special gift for you...


I created a card, envelope (with a gorgeous liner!) and a wrapped gift... all using the fabulously new "i steel got it" color.  It's a beautiful light grey neutral that I know I'll be reaching for all the time.

My card features over-sized ornaments, masked to sit as a trio onto a beautiful cake stand.  The sentiment creates a frame around the ornaments, and the whole thing rests on glitter and a strip of stamped striped grey paper.

The envelope liner was stamped with the same wreath image as the ornaments, and each bow was colored with the same metallic mauve pencil, to tie it in with the card.

A silver glimmer die cut echoes the glittery strip on the card, and I created a little tag to announce what's inside my wrapped box...

An assortment of Christmas cookies, from me to you (or really, from me to me... I may have eaten a few already, hee hee.)

Keep on hopping!  On each designer's blog is a new gift ensemble in a brand new color, perfect for inspiring you if you like to DIY your holiday presentations...


Supply list (all CSS unless noted)
stamps: sweet sentiments holiday, rag doll house, rag doll scenes 1, cake decorating, cookie bake
inks: i steel got it, crayola metallic colors pencil crayons
dies: wrappers
paper: a blanc check, i steel got it

Friday, November 9, 2012

mason jar thanks {CSS release in review}


My final day in a string of CSS posts brings on the mason jar love.

I used the smallest mason jar images and the "alpha duo" set to create a fun little thank you card set.  I strung up the jars, plunked the letters inside (and outside!) and called it done.

I love the little detail of that heart (from "taglines: critters") in each jar...

And, why not add some jar-shaped stickers?  I ran die-cut-and-stamped-jars through my xyron sticker maker.  How fun would it be to seal the envelopes with these?

Click over to see what the other canned goodness the designers have cooked up:

Jen Amber CSS